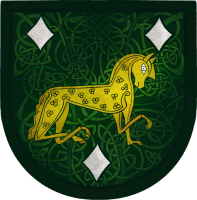
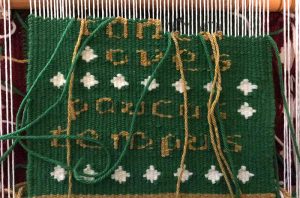
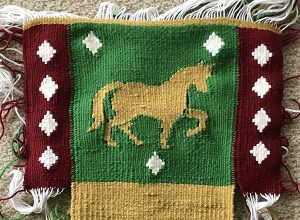
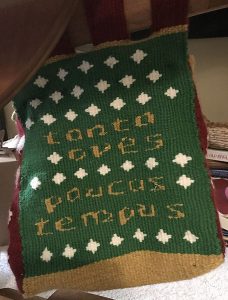
For my third-ever tapestry project (the other two done before I joined the SCA), I went a little overboard: I wanted to weave a bag for my spinning wheel with my device on one side. After an entertaining discussion at my local shire meeting, I decided to add a motto on the other: tanta oves, paucas tempus (so many sheep, so little time).
Pattern & Design
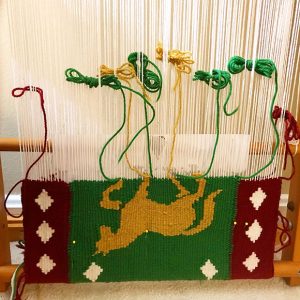
For the pattern, I wanted to weave the bag in one piece so that I all I had to do was fold and sew it. I also gave it multiple straps to hang it from my wheel, plus straps with buttons to close it.
I created the designs on my computer, as I had already drawn a digital version of my device. I also had some good fonts to use as a jumping-off point for the text. I printed these out and used them as a cartoon behind the loom, though I did Sharpie some spots on the warp to assist in alignment.
Materials & Process
I used my vertical tapestry table loom for this project. Because of the bag layout, the pattern was woven so that the warp ran vertically in the final product, as opposed to horizontally (as in period). I was determined to weave from my yarn stash, so my warp was a midweight cotton and my weft was a worsted-weight knitting wool. Because the straps were woven in, so were the buttonholes. The buttons were leftover ones that I made out of Sculpey for a baby sweater; I sewed them on at the end.
Challenges
The choice of warp and weft led to the greatest issue with the tapestry, which could modernly be called “pixelization.” Because my gauge was large by my pattern had some finer details and many curves, the final product ended up less smooth than I wanted. This was also my most complicated tapestry so far (horses are notoriously hard in art!), so I learned a lot from these challenges! Also, I totally went overkill on straps.
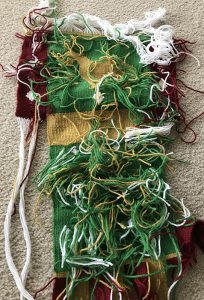
Progress Photos & Final Project
|
|
|
|
|
|
|
|
|
|
|
|
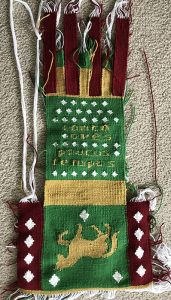
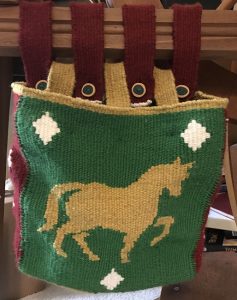
Overall, I’m happy with the bag. It fits on my wheel and holds all my bobbins plus my niddy-noddy, diz, and some wool. It doesn’t interfere with carrying the wheel, either! Finally, I learned so much from this project that I know my next tapestry will be leaps and bounds better.